While it drove 1000+ miles home uneventfully and felt great mechanically, it was a little bit of a mess in other ways when we picked it up. Aside from the aforementioned paintwork, the hatch wouldn't stay open (nor lock), the seats rocked like crazy, the dead pedal was cracked, the headlights were nearly opaque, the door and hatch handle gaskets were disintegrating away, the key fob buttons worked intermittently, most of the bulbs in the 3rd brake light were burnt out, the glove box was hanging, all the roundels were down to bare metal, the seat bolsters were worn, the door panel trim was hanging off, the interior driver door handle came off in my hand, the washer fluid lines were missing, and everything rattled. Oh, and there was still that oil leak. It was definitely a project.
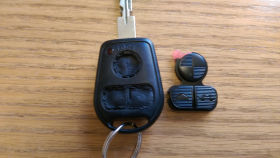
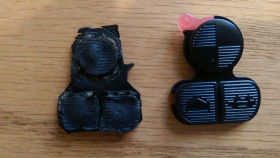
The OCD side of me hates when things work intermittently, so the key fob was driving me crazy. It worked about 1/3 of the time. The first thing i tried was batteries which seemed to help a little, but definitely didn't cure it. The key is an all-in-one key and fob which I hadn't seen before. The rubber buttons were sunken and deteriorated, so I decided to see if there was any way to replace them without having to get a new key cut and coded. I did a little Ebay searching and fortunately found replacement buttons from a seller in Taiwan. I also picked up some door handle gaskets from them as the Asian replacements have always seemed better quality to me than the OEM ones. The rubber fob replacement popped right in, looked like a brand new key, and worked 100% of the time.
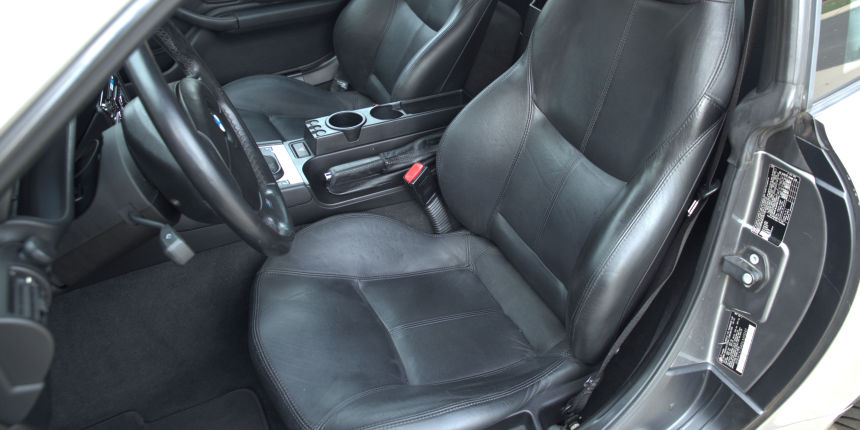
I next started addressing the issues that influenced driving enjoyment as I planned to drive it a lot. Luckily I had the parts on hand as I collect them whenever I find them cheap since I know I'll use them. If you've ever driven a Z3 with bad seating bushings, you know how disconcerting it can feel. Every time you have to come to a hard stop, your forward momentum in the seat continues as the rest of the car slows down. It takes a lot of the fun out of driving aggressively as well. As I've installed seat bushings in nearly all of the Project Coupes, the project itself went smoothly. It also presents a great opportunity for deep cleaning the interior and carpet. Also, while I had the seats out, I had need of rearranging cars. I attempted to drive while sitting on the floor for the first time. My kids thought it was so funny looking they took the obligatory photos. I was just thankful for the automatic.
Next up was the cracked dead pedal. This is another common issue I've had even in the lower mileage coupes. The dead pedal is connected to the plastic speaker panel in the driver foot well with just empty space behind it. It's not surprising that a hard stop with lots of weight pressing on the now 15 year-old, brittle plastic corner can finish it off. Someone recently posted an article on a method to fill the empty space behind it with Great Stuff foam. Unfortunately, it was published after I finished this project, but it's a great idea I'll attempt on future projects. In any case, this fresh, new dead pedal panel should be good for another 10+ years for the new owner.
After I exhausted my parts supply, I sent in my first of several orders to Ed at Bimmerbum. While waiting for the parts to come in, I took it to the local body shop that has worked on nearly every Project Coupe. I happened to drive by while they had it and stopped to snap a couple bumper-less photos of it in Mad Max mode. They painted the bumpers and passenger rear fender, and it looked like new just a couple days later. Encouraged by the new look I continued to work on the exterior. I replaced the door handle and rear hatch gaskets then applied some Mother's Back to Black to the roof rails, rear spoiler, the inside of the Z3 side gills, and on the spare tire well that shows below the rear bumper. While the rear spoiler was off, I popped out the stock 3rd brake light, and replaced it with one of Rob's cool LED ones. I was very tempted to keep the LED rear light for my coupe, but in the end decided I'd let this coupe use it. I'll definitely be buying more of them as it was an easy swap and much cheaper than a new, stock one. I then replaced the cracked bumper lights with new OEM ones and polished the cloudy headlights. A couple tips from experience, the side and rear roundels are pressure fit and have stickers holding them on. I used my wife's craft embellishment heat gun to get the roundels really hot and weaken the adhesive and they came off much, much easier. The hatch gasket probably will not come off cleanly; mine pretty much disintegrated all over my garage floor. I ended up using my polisher to get off the rubber residue that baked onto the hatch then used Adam's Metal Polish to shine up the chrome handle. It's really crazy what a couple gaskets and new emblems do for the look of the car. Check out the photos below.
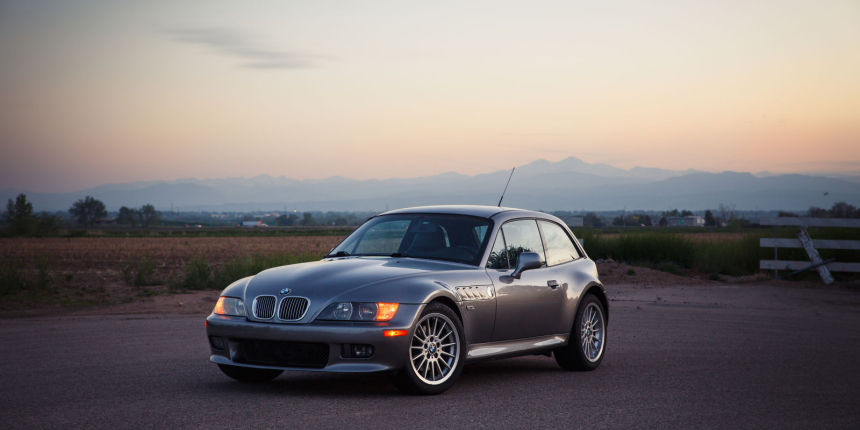
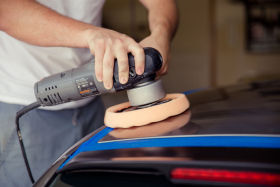
With the new paint looking so nice, I was inspired to make the rest match and did a 3-stage paint correction on the other panels. Colby had handed me down his old Porter Cable polisher, and I was gifted Adam's polishes and pads for Christmas. The paint started rather dull and full of swirl marks. It's amazing what a long, long, long day of manual labor can do. Also, the sunroof-delete made polishing the roof much easier as the thin panel in front of the sunroof is usually a pain. I just beat the sunset and rushed to the end of my street to take the photo at the top of the article while the coupe was looking its best. Sadly the side gill roundels had not arrived yet as you may notice.

It now looked fantastic, but I still had an oily piece of cardboard beneath it. I went back and forth if it was worth my time to change the oil filter housing gasket myself, or just pay a professional. One Saturday morning feeling motivated, I read the DIY article 3-4 times then started taking things out of the engine. It really was pretty simple in the end. I had done most of the steps before while performing other projects like changing belts, water pumps, thermostats, etc. It pretty much just additionally required the removal of the alternator which was not as bad as I expected. The best part? No more oil leak finally. The worst part? I had just bought a 4-post lift and this job did not in any way require it. The lift was very handy for cleaning up the previously leaked oil on the undercarriage afterward however. I used several articles and YouTube videos, but this one was the most helpful for the steps I had not done previously.
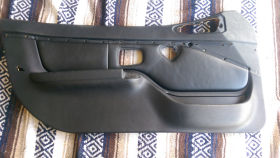
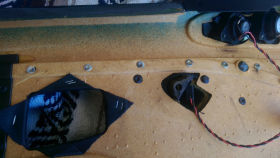
It was finally time to address the last couple interior issues. The aluminum door trim had been hanging off since I purchased it. I was never fully able to figure out how it was attached to the door panel until I removed it. I always assumed it was either small clips like other interior pieces, circlips on pins or else it would just slide in place from the front. Wrong! Basically, the trim has 18 plastic pins that poke through the door panel that need to be melted in place to hold it tight. No wonder my attempts at repairing the old ones failed. I purchased two new trim pieces and took an afternoon to melt off the existing ones. It took a little experimentation, but my soldering iron ended up working great with some patience, and the new trim pieces look as good as new. Thanks to Jon Maddux for the video instructions!
My attempts to re-glue the hanging driver door handle worked for a while but failed in the end, so I ordered a brand new one. While I had the door panel off to replace the trim, I installed the new handle and also took the opportunity to lubricate the window sliders. It made me smile every time I pulled the door closed afterwards not having to pull gingerly in hopes it would not detach once again or try to palm the armrest during the times it was completely detached.
Some where in there I also fixed the sagging glove box with Never Done Garage's new fix kit (which I really liked), replaced the lock actuator in the hatch to tie it back into the central locking system, took it to the Leather Dr. for seat bolster refurbishment, and replaced the washer fluid pump reservoir and lines. After the writing this article I can understand a little more how I've had it an entire year. That's far from the only reason I had it so long though. When all was said and done, I really loved this one. It's hard to let it go. More on that in the next article.